Here is a useful guide based on the typical process:
Open the SBI Yono App:
- Ensure that you have the latest version of the SBI Yono app installed on your smartphone.
Login:
- Log in to your Yono app using your credentials, such as username and password.
Navigate to KYC Section:
- Look for a section in the app related to KYC or profile settings. This could be in the "Profile" or "Settings" menu.
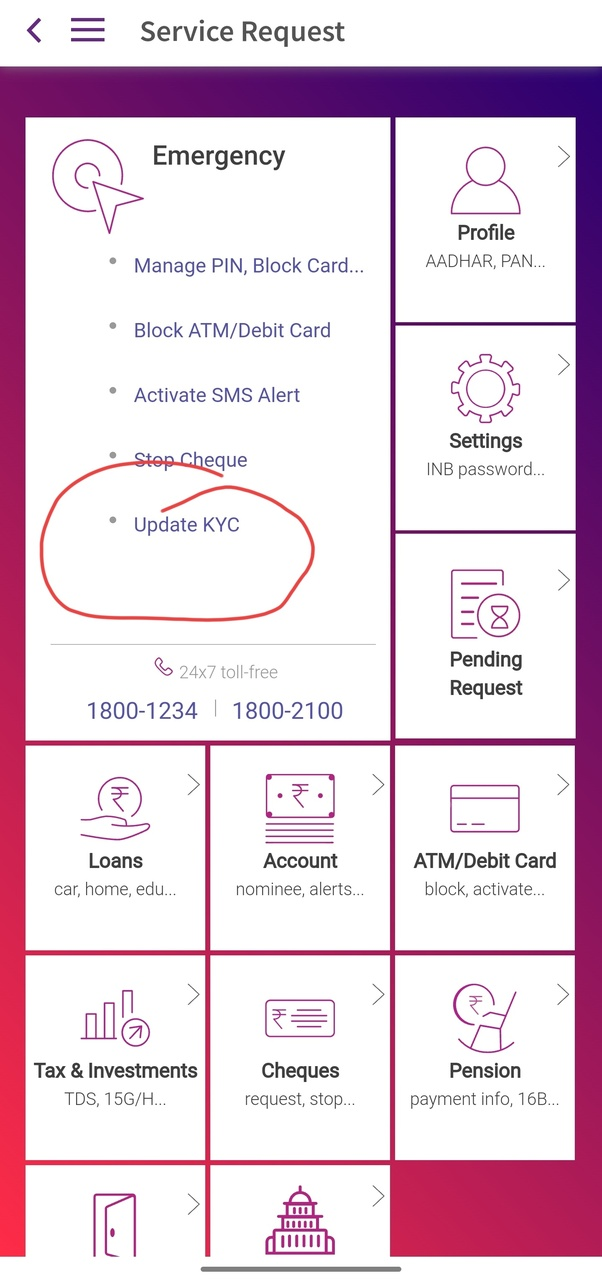
Update KYC Details:
- Once in the KYC section, you may find an option to update or verify your KYC details. Select this option.
Provide/Verify Information:
- Follow the on-screen instructions to provide or verify the required information. This might include personal details, contact information, and documents like Aadhaar card, PAN card, passport, etc.
Document Upload (if required):
- If the KYC update involves document submission, the app may prompt you to upload the necessary documents. Make sure you have clear and valid copies of the required documents.
Submit Information:
- Complete the submission process as instructed by the app. Ensure that all the required fields are filled correctly, and any uploaded documents meet the specified criteria.
Visit Branch (if required):
- Depending on the KYC update process, you may be required to visit the nearest SBI branch for in-person verification. Check the app for guidance on whether this step is necessary.
Confirmation:
- After submitting the KYC update, you should receive a confirmation message on the app. This may take some time for processing.
Check KYC Status:
- Some apps provide a feature to check the status of your KYC update. If available, use this feature to ensure that your KYC has been successfully updated.
We hope that you like this content and for more such content Please follow us on our social site and YouTube and subscribe to our website.
Manage your business cash flows and payable/receivables using our Bahi Khata App